Unity custom Light Attenuation using Light Layer Mask
At the beginning of the year, I had the pleasure of working on a VR game called Lichtung. It’s a 2D/3D VR project set in a dark, stylized forest where the player controls a flashlight to explore the world around them. The goal was a cozy, atmospheric experience. One of the bigger challenges stylistically was how Unity’s default physically-based lighting behaved. Its realistic falloff naturally limits how far a light reaches, which created a rather spooky effect. To counteract that we needed to bend the rules of light attenuation and give it a more stylized look.
Below, we’ll look at a modification to a core function in Unity’s RealtimeLights.hlsl shader file that unlocks a higher level of control over light behavior. Instead of most other solutions online this approach is based on Light Layer Masks, which means multiple attenuation models can be used at the same time
Original Version
// Matches Unity Vanilla HINT_NICE_QUALITY attenuation
// Attenuation smoothly decreases to light range.
float DistanceAttenuation(float distanceSqr, half2 distanceAttenuation)
{
    // We use a shared distance attenuation for additional directional and puctual lights
    // for directional lights attenuation will be 1
    float lightAtten = rcp(distanceSqr);
    float2 distanceAttenuationFloat = float2(distanceAttenuation);

    // Use the smoothing factor also used in the Unity lightmapper.
    half factor = half(distanceSqr * distanceAttenuationFloat.x);
    half smoothFactor = saturate(half(1.0) - factor * factor);
    smoothFactor = smoothFactor * smoothFactor;

    return lightAtten * smoothFactor;
}
This is from the RealtimeLights.hlsl Unity package file which will come with your unity install, easiest way to find it is to just search for it in the asset menu.
We will focus on the line float lightAtten = rcp(distanceSqr). It implements the inverse-square falloff, so the light weakens dramatically as you move away from its source. Without this, nearby areas would be unnaturally bright while distant areas remain too dark. The smoothFactor smooths the edge of the light’s influence, giving a gentle fade rather than a sharp cutoff.
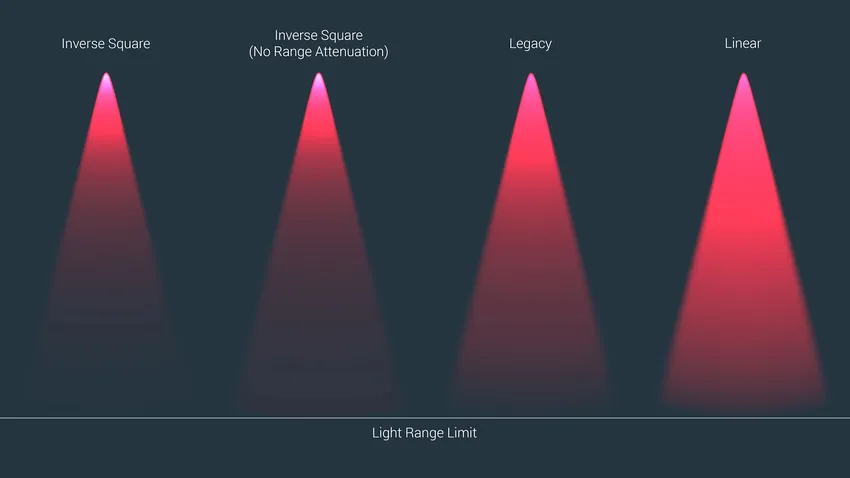
This Image from the offical unity documentation shows what different light fallofs can look like.1
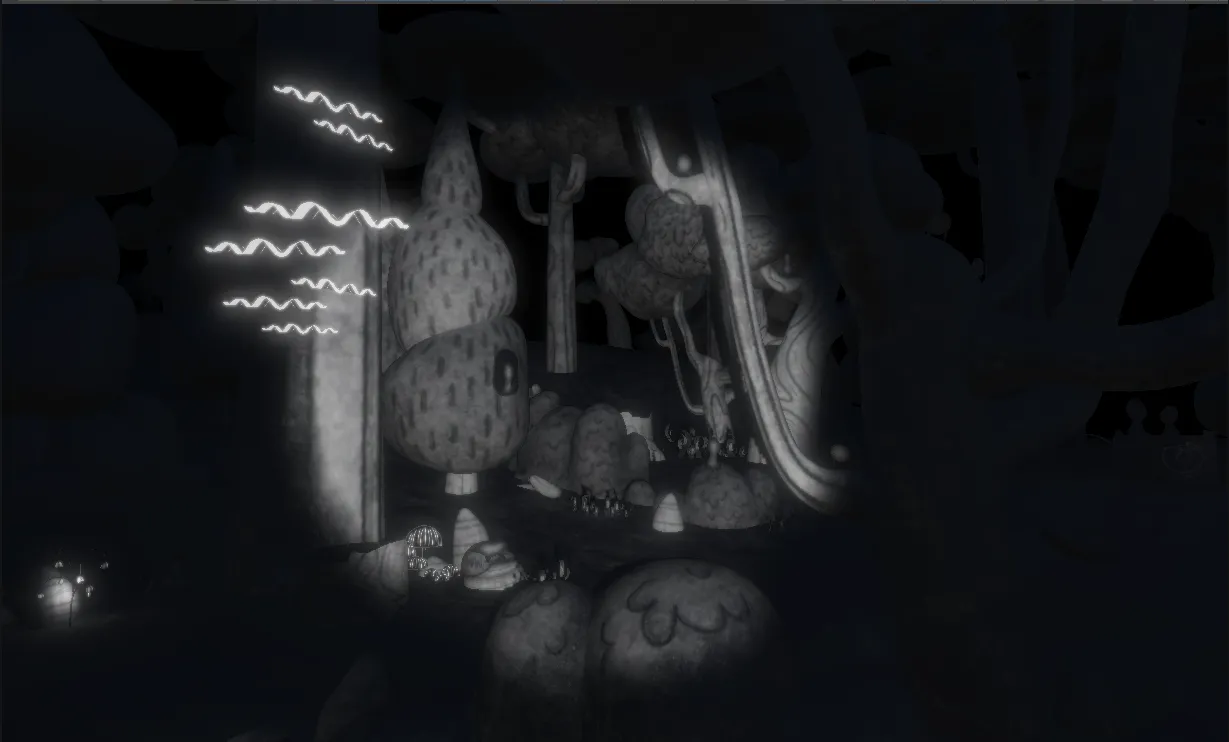
In Engine

Looking at our Scene in Engine we can see, that seeing anything farther than 5m is pretty much impossible and closer objects get blown out. The over exposure is the reason why we cant just increase the light brightness. To get the control we needed, we need to modify this function to decouple the falloff from physical realism and shape the light exactly how we want.
Modified Version
  // Modified Version
float DistanceAttenuation(float distanceSqr, half2 distanceAttenuation, uint lightLayerMask)
{
    float scaleFactor = 0.0;
    float lightAtten = 0.0;
    // ... other variables

    if (lightLayerMask & 0x2) // Check if the light is on a specific layer
    {
        // --- NEW LOGIC ---
        distanceSqr = sqrt(distanceSqr);       // Convert squared distance into linear distance
        scaleFactor = 0.025;                   // Scale to control effective range
        distanceSqr = distanceSqr * scaleFactor;
        lightAtten = 1.0 - saturate(distanceSqr); // Linear falloff from 1 → 0
        // ... smoothFactor calculation remains similar
    }
    else
    {
        // --- ORIGINAL LOGIC ---
        lightAtten = rcp(distanceSqr);         // Default to inverse-square
        // ... original smoothFactor calculation
    }
    return lightAtten * smoothFactor;
}


}
What Changed?
The function now accepts a uint lightLayerMask parameter, which RealtimeLights.hlsl conveniently exposes. This allows the shader to decide which attenuation model to apply based on the light’s layer configuration in the Unity editor.
Using a bitwise check lightLayerMask & 0x2, the code branches into two different behaviors.
Custom falloff (linear)
distanceSqr = sqrt(distanceSqr);
scaleFactor = 0.025;
distanceSqr = distanceSqr * scaleFactor;
lightAtten = 1.0 - saturate(distanceSqr);
Unity’s lighting code usually passes around the squared distance for efficiency (avoids unnecessary square roots). Here, we take the square root to recover the actual linear distance from the light to the shaded point. Because a linear distance lets us create a simpler, more pleasing falloff function.
scaleFactor = 0.025;
distanceSqr = distanceSqr * scaleFactor;
The goal is to map the world-space distance to a normalized range of [0,1], where 0.0 represents the light’s origin and 1.0 represents its maximum range.
The scaleFactor (in this case, 0.025) is the inverse of the light’s intended maximum range. So, a scale factor of 0.025 implies the light has a range of 40 units (1/40=0.025).
- (I decided on 40 units after some testing, but you can choose your own magic number)
By multiplying the linear distance by this factor, we get a new value that tells us “how far along” the light’s range we are.
- At the light’s center (distance = 0), the result is 0 * 0.025 = 0.0.
- Halfway to the edge (distance = 20), the result is 20 * 0.025 = 0.5.
- At the maximum range (distance = 40), the result is 40 * 0.025 = 1.0.
lightAtten = 1.0 - saturate(distanceSqr);
This final line uses the normalized distance to calculate the light’s intensity.
saturate() is a standard shader function that clamps a value to the [0,1] range. It’s a safety measure to ensure that if a pixel is somehow calculated as being beyond the light’s range, we don’t get negative light values.
The result is a Light that decreases in a straight line. This is much more gradual and predictable than the steep curve of inverse-square falloff.
Lights not in the Light Layer keep the old light logic, ensuring other lights in the scene still behave normally.
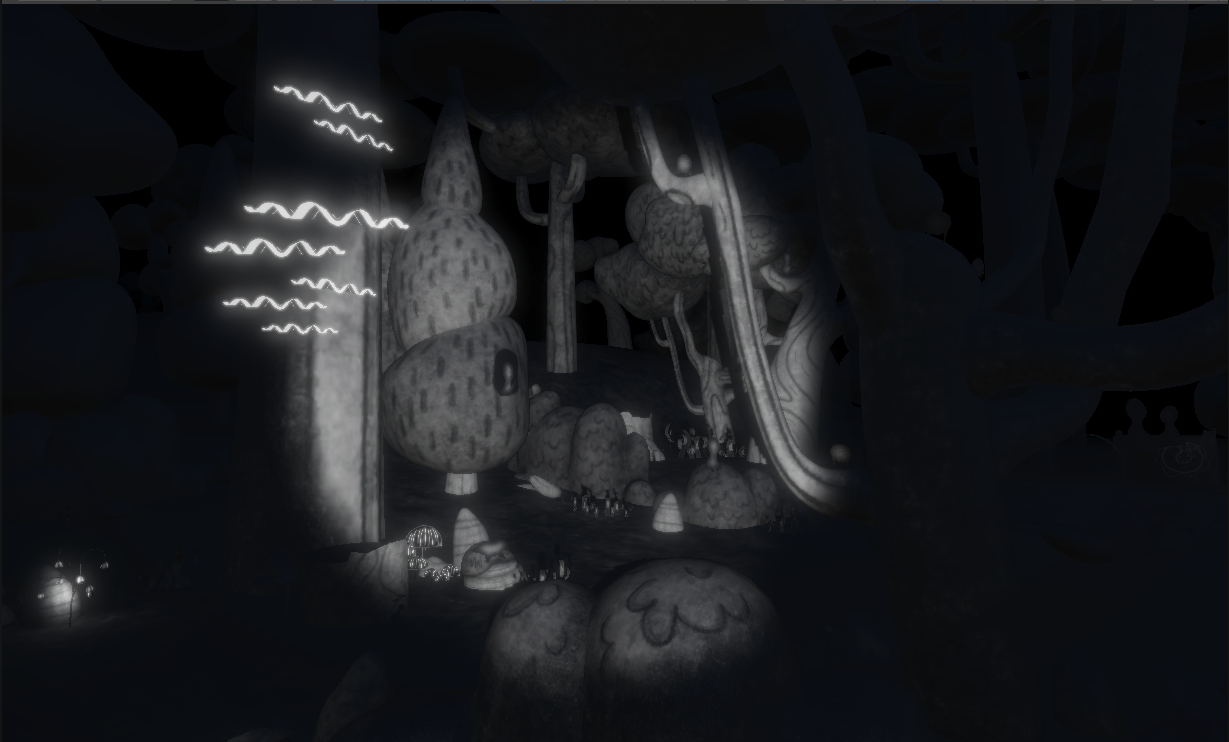
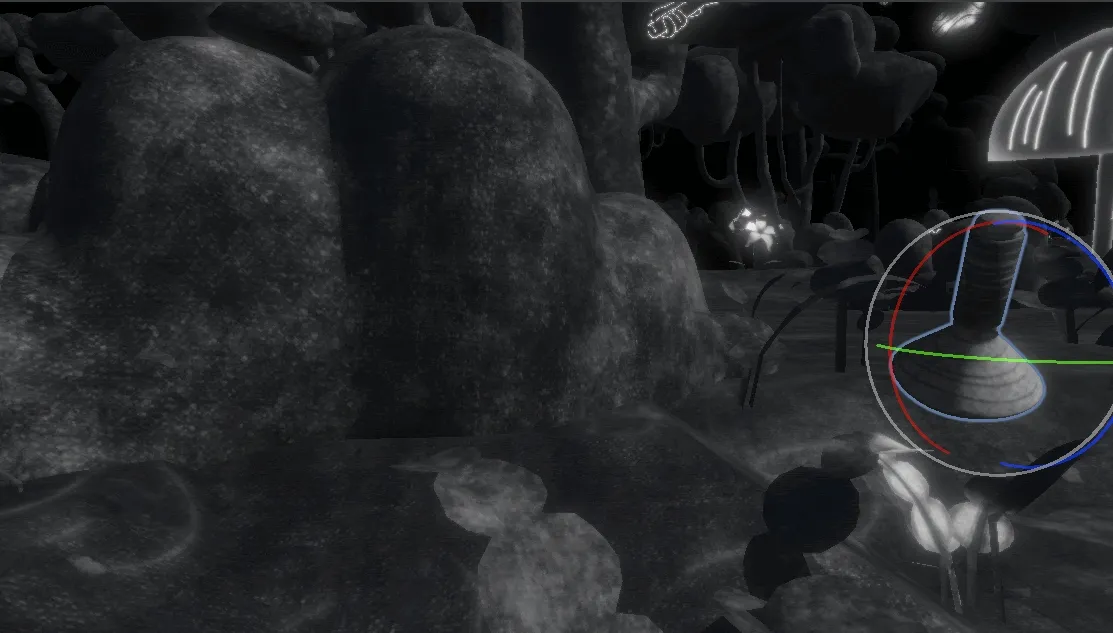
Here you can see the light attenuation changing with the light layer selection.
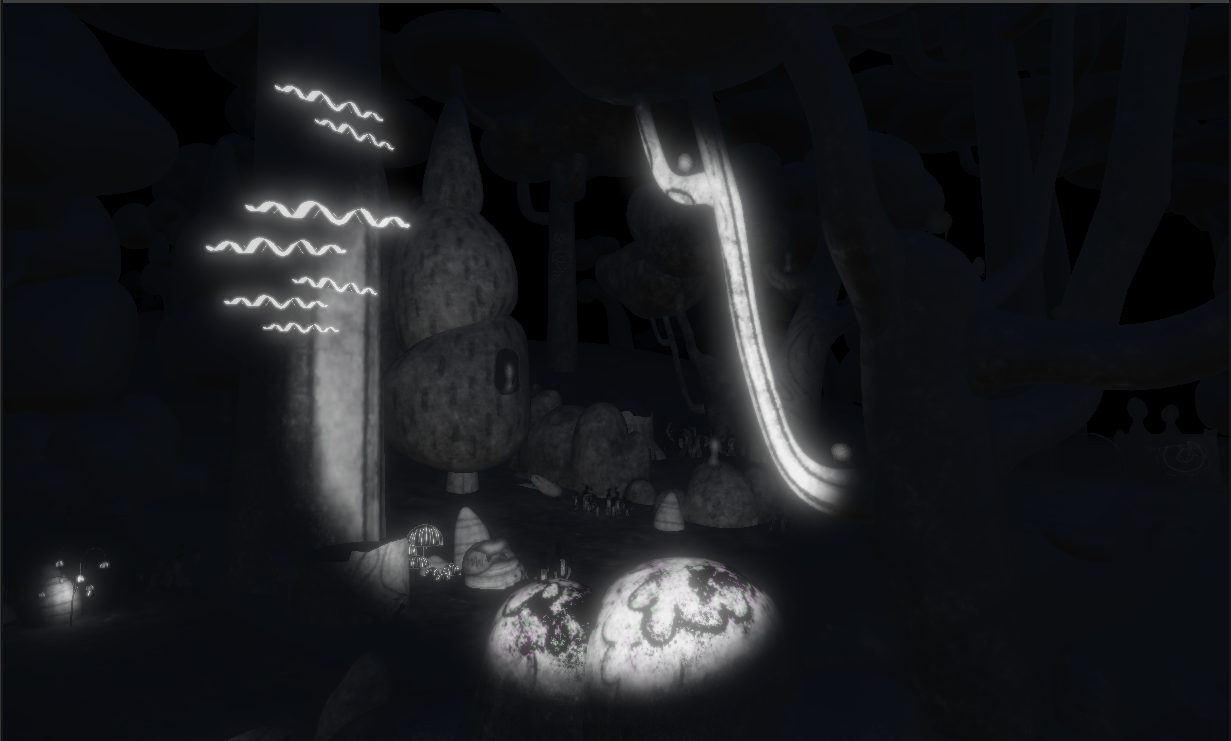
New look
No more blown out highlights up close and a greater visible distance! Check out the before and after below
Conclusion
The beauty of this approach is that you’re no longer locked into a single type of light falloff. With Light Layer Masks, you can mix and match attenuation models in the same scene. The performance impact of the linear version should be negligible in most cases. While I haven’t done thorough testing we didn’t notice any issues running on a Quest 3.
And while I’ve shown a simple linear fade here, you can just as easily plug in other curves to shape the light exactly how your project needs it.
small addon
Light attenuation was one of the biggest tricks to give the shading and lighting a unique feel. Another important piece was texture mixing inside the light cone. Many assets shipped with light and dark texture variants, and the shader would blend between them depending on how strongly the light hit a surface.
This gave the world a layered, stylized look instead of just brightening or dimming the same base texture. There are some good guide out there to get that working but if you need any help, feel free to contact me.
Footnotes
-
for some reason this only works out of the box when you use Baked or Mixed lights. To use different falloffs with realtime lights unity recommends to use the middleware Enlighten Realtime Global Illumination. ↩